
Installation of fine bubble diffuser
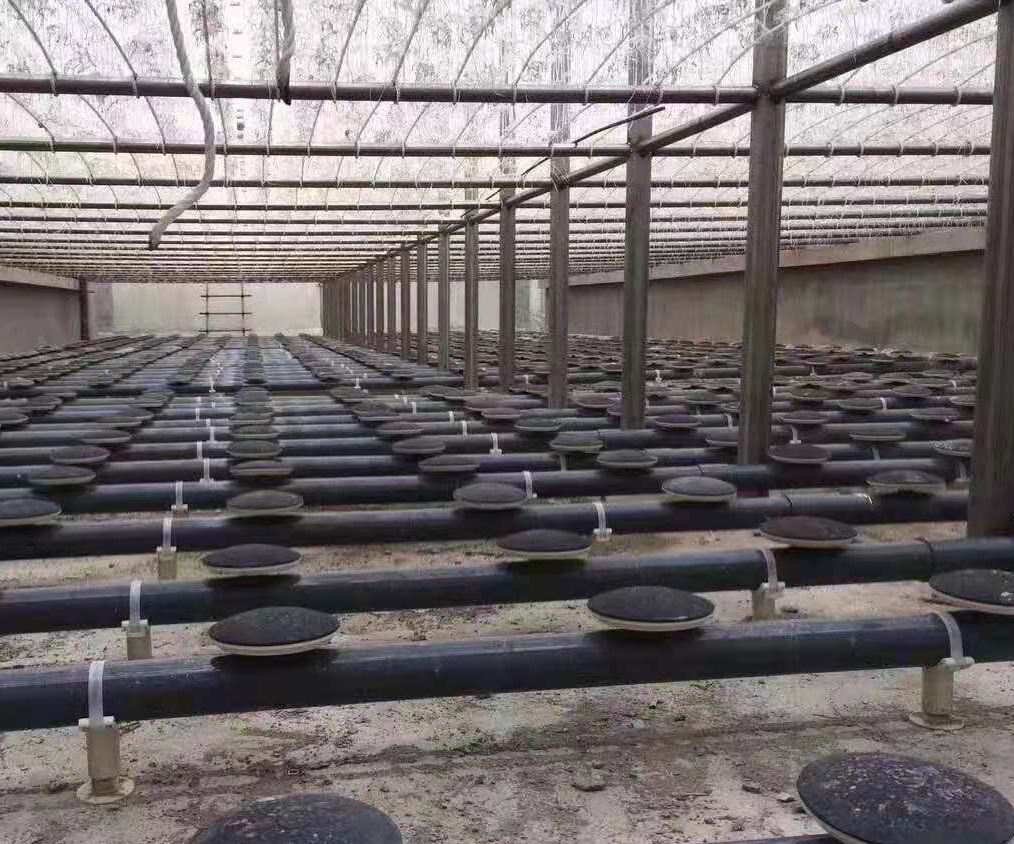
Fine bubble diffuser is a new type of aeration facility, which can meet the requirements of all aeration tanks, biological contact oxidation tanks, biological stabilization ponds and other places.
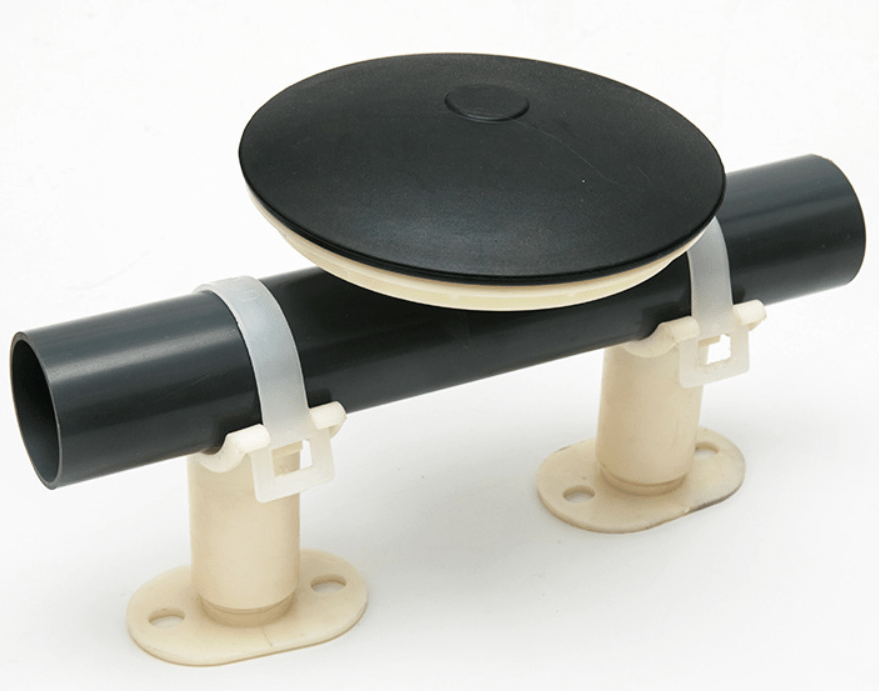
The membrane aerator is arranged according to the air supply volume and the density of the pool shape. The aerator and the air distribution pipeline are connected by G3/4 threads, the base is an internal thread (fixed on the air distribution pipeline), and the aerator is an external thread. When installing, first fix the required size of the regulator on the bottom of the pool, and then fix the air distribution pipe on the regulator with a hoop.
Installation steps of bubble diffuser
- Review the installation construction drawings;
- Check whether the size of the on-site pool is consistent with the construction drawings;
- Set out the line according to the site conditions and drawings;
- Hit the expansion bolts according to the line, and install the adjustable pipe bracket;
- Start cutting and blanking according to the drawing size;
- Position the middle intake main pipe, and bond the matching spool or tee (note: it must be horizontal and vertical);
- According to the position of the aerator on the drawing, lay out the line and open the hole on the branch pipe. The size of the hole is generally 6-8mm, which is determined according to the specific aerator model; (the debris after drilling must be cleaned up and must not be left behind. in the pipeline)
- Put the branch pipe on the adjustable pipe bracket and glue it together with the middle intake main pipe (note: the hole punched on the branch pipe must be vertically upward);
- Glue the tee joints and elbow joints of the side pipes on both sides with the nozzles of the branch pipes. (Note: it must be horizontal and vertical)
- Adjust the levelness of the whole pipeline with the adjustable pipe bracket;
- Tie on the nylon cable tie of the adjustable tube bracket (method: buckle the non-hole side of the nylon cable tie into the slot of the bracket, and then find a 12mm iron rod and insert it into the square hole of the nylon cable tie, gently It is buckled as soon as it is pressed);
- Glue the aerator nozzle at the position where the hole is punched on the branch pipe (note: the aerator nozzle must be vertically upward);
- After the aerator nozzle is firmly bonded (about 24 hours), install the bubble diffuser;
- After the installation of the aerator and the pipeline is completed, in order to prevent air leakage in the connecting part of the pipeline, clean water should be placed in the tank to about 100mm above the aerator, and then ventilated for testing. If any air leakage is found, it should be marked and repaired in time. After being fully qualified, it can be officially put into use.
Notes when install fine bubble air diffuser
- In order to prevent other operations such as welding sparks and civil construction from damaging the aeration device, the installation of the aeration piping system must be carried out after the civil construction is completed.
- ABS nozzles can be bonded without grinding. UPVC nozzles must be bonded after grinding. ABS pipes are recommended for aeration pipelines.